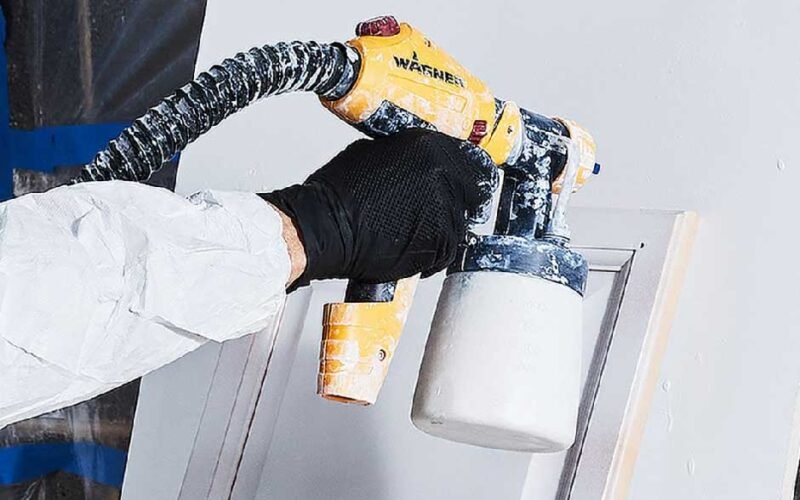
Choosing the right paint sprayer for your DIY projects can make all the difference in achieving a professional finish at home. A paint sprayer can save you time and effort, providing a smooth, even coat of paint on walls, furniture, and various surfaces. Here’s a comprehensive guide to help you select and use a home paint sprayer effectively.
Understanding Different Types of Paint Sprayers
Before diving into the selection process, it’s essential to understand the different types of paint sprayers available on the market. Each type has its unique features and is suitable for specific applications.
- Airless Paint Sprayers: These sprayers use high pressure to atomize the paint, creating a fine mist that coats surfaces evenly. They are ideal for large surfaces like walls, ceilings, and fences. Airless sprayers are known for their speed and efficiency.
- HVLP (High Volume Low Pressure) Sprayers: HVLP sprayers use a high volume of air at low pressure to spray paint. They are perfect for detailed work and smaller projects, such as furniture and cabinets. HVLP sprayers produce less overspray and provide better control.
- Compressed Air Sprayers: These sprayers use compressed air to apply paint and are often used for automotive and industrial applications. They offer a smooth finish but can produce a lot of overspray and require a steady air supply.
Factors to Consider When Choosing a Paint Sprayer
Selecting the right paint sprayer involves considering several factors to ensure it meets your project needs and provides a high-quality finish.
- Project Size: Determine the size of your project. For large surfaces like walls and fences, an airless sprayer is more suitable. For smaller, detailed projects like furniture, an HVLP sprayer is ideal.
- Paint Type: Consider the type of paint you’ll be using. Thicker paints like latex require a more powerful sprayer, while thinner paints can be applied with less powerful models. Check the sprayer’s specifications to ensure compatibility with your paint.
- Ease of Use: Look for a sprayer that is user-friendly, especially if you’re a beginner. Features like adjustable settings, lightweight design, and easy-to-clean components can make the spraying process more manageable.
- Budget: Paint sprayers come in a range of prices. Determine your budget and find a sprayer that offers the best features and performance within your price range.
- Maintenance: Consider the maintenance requirements of the sprayer. Some models are easier to clean and maintain than others. Regular maintenance is essential for prolonging the life of your sprayer and ensuring consistent performance.
Steps to Using a Paint Sprayer Effectively
Using a graco homeowner sprayer effectively involves proper preparation, technique, and maintenance. Here’s a step-by-step guide to help you achieve the best results.
- Preparation: Start by preparing the area you’ll be painting. Cover floors, furniture, and any surfaces you don’t want to be painted with drop cloths or plastic sheeting. Ensure the area is well-ventilated.
- Surface Preparation: Clean the surface you’ll be painting to remove dust, dirt, and grease. For rough surfaces, sanding may be necessary to create a smooth base for the paint.
- Mixing the Paint: Mix the paint thoroughly to ensure an even consistency. If the paint is too thick, you may need to thin it according to the manufacturer’s instructions. Strain the paint to remove any lumps or debris that could clog the sprayer.
- Setting Up the Sprayer: Set up your paint sprayer according to the manufacturer’s instructions. Adjust the pressure and spray settings to match your project needs. Practice spraying on a piece of cardboard or scrap material to get a feel for the sprayer and adjust the settings as needed.
- Spraying Technique: Hold the sprayer at a consistent distance from the surface, typically around 10-12 inches. Move the sprayer in a smooth, even motion, overlapping each pass slightly to ensure an even coat. Avoid stopping and starting in the middle of a pass to prevent uneven coverage.
- Multiple Coats: For the best results, apply multiple thin coats of paint rather than one thick coat. Allow each coat to dry according to the paint manufacturer’s recommendations before applying the next coat.
- Cleaning the Sprayer: After completing your project, clean the sprayer thoroughly to prevent paint from drying inside the system. Follow the manufacturer’s cleaning instructions, typically involving running a cleaning solution through the sprayer and disassembling the parts for a thorough cleaning.
Conclusion
Selecting and using a home paint sprayer can significantly enhance your DIY projects, providing a professional finish with less effort and time. By understanding the different types of paint sprayers, considering key factors in your selection, and following proper usage and maintenance steps, you can achieve outstanding results and keep your sprayer in excellent condition for years to come. Whether you’re painting walls, furniture, or other surfaces, a paint sprayer is a valuable tool that can help you achieve your creative vision with ease.


